
Language Fallback in Pure Experience Editor - Sitecore 9
Recently, I was met with the challenge of working with language fallback in a purely Experience Editor based solution. Most of the usual language fallback rules still apply, but I did find that I had to close some gaps between what is available in the Content Editor versus the Experience editor.
Consider the following circumstances and issues.
-
Circumstances
-
Sitecore 9.1.1.
-
Language Fallback is enabled on the page level.
-
Language Fallback is enabled on the data source level.
-
-
Problems
-
Create a new version while retaining the layout from the fallback language.
-
Need the ability to override the fallback per rendering data source.
-
Create a new version while retaining the layout from the fallback language
This problem isn’t necessarily Experience Editor specific, but the solution I have developed is specific to Experience Editor. Since Sitecore 8, page layouts have used final renderings. Final renderings allow for different page layouts for different language versions, but it does introduce the problem of having to recreate the page layout for each version. To solve this problem, I have created a custom experience editor ribbon item that copies the final layout from the fallback language when creating a new language version. Note that there is an existing blog that has a dialog pop up for Sitecore 8 that details some of the same steps below.
The first step is the ribbon button.
All the ribbon buttons are stored in the core database, so if we want to add a new one, we need to navigate to /Sitecore/content/Applications/WebEdit/Ribbons/WebEdit in the core database. Here you will find an item and folder the corresponds to each of the sections of the ribbon in the experience editor. In this case, I want to add a new button that will create a new version with the layout, so I copied /Sitecore/content/Applications/WebEdit/Ribbons/WebEdit/Versions/Versions/Add and renamed it to Add With Layout.
You will want to update the header and tooltip, as well.
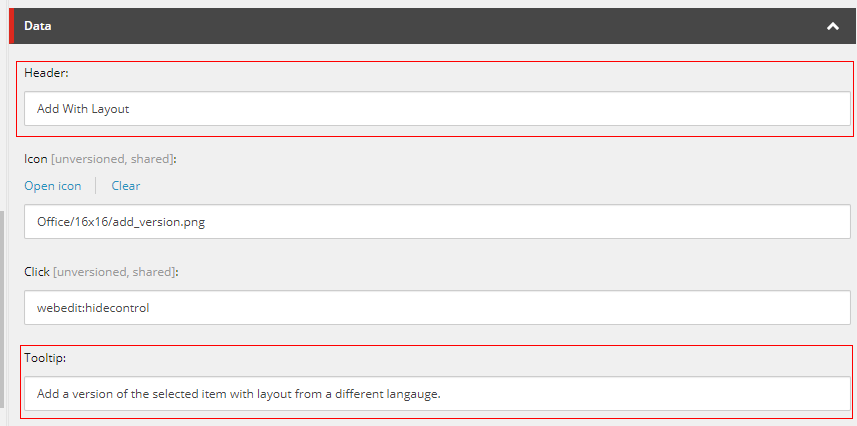
You are also welcome to update the Icon.
Merely creating this item will have it show up in the experience editor ribbon where the default “Add Button” is.
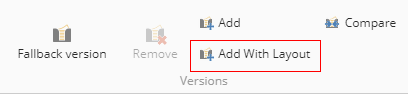
However, clicking this button will do exactly what the default “Add Button” does. To update this, we will need to use Sitecore Rocks. After you have set up Sitecore Rocks, navigate to the item we created and edit the layout of the item, (CRTL + ENTER) on the item. Here you should find a SmallButton Rendering.
If we edit the SmallButton rendering, we will see the fields we need to update.
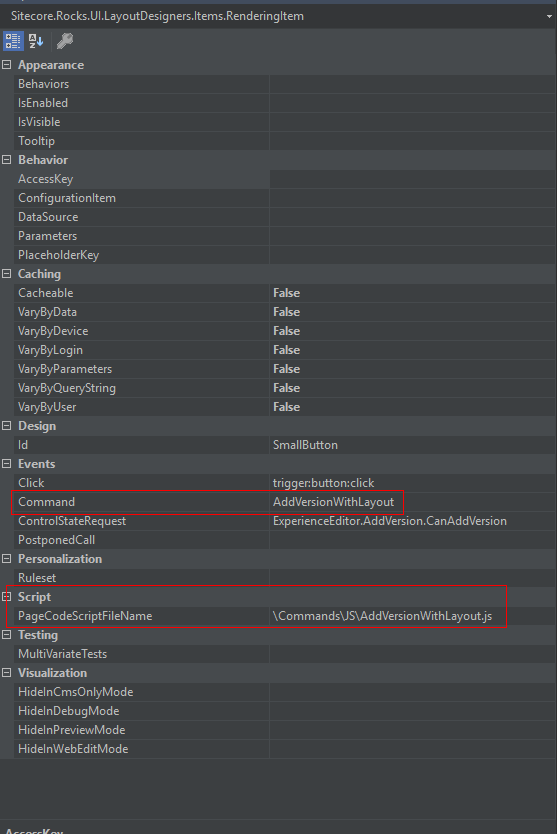
As you can see, the Command field refers to a C# class and is configured in a config file, and the PageCodeScriptFileName is simply a path to a JS file.
Now that we are copying the Add functionality, we can copy the Add files.
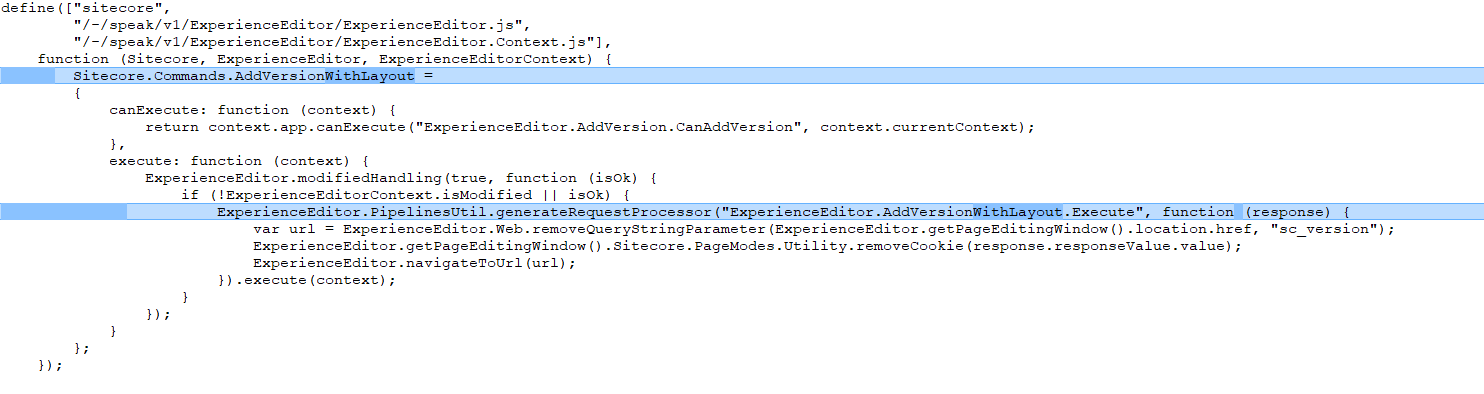
First, let’s copy the JS File for Add and rename it AddVersionWithLayout.js, as you see in the properties screenshot above. All you need to do in this file is to change the command that it is calling, as seen below.
Once you’ve done this, it’s time to move onto the command. For this, I did the same thing as I did with the JS, but because it is a C# file, I had to decompile the class to copy it. The copied code can be seen below.
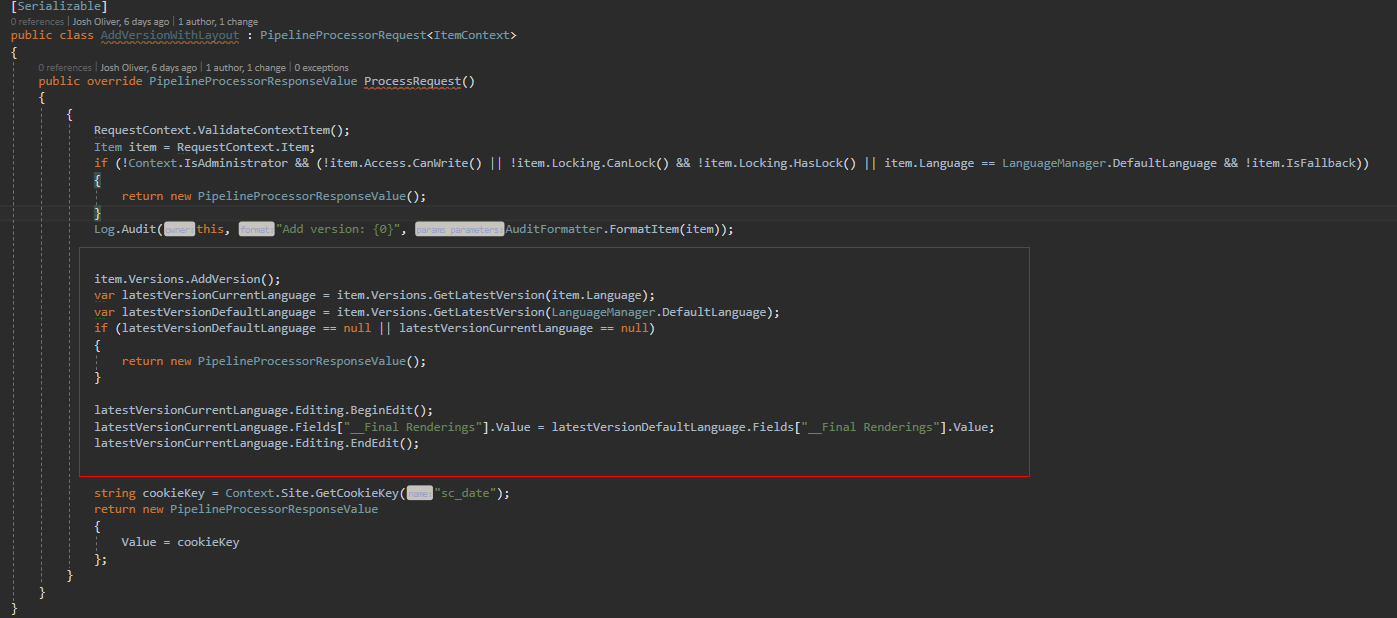
The only changed part is in the middle, where we are copying the renderings. As you can see, all it is doing is copying the Final Renderings field from the default language version of the item to the newly created version. The rest of the code is the default Add Version code. This class can be in whatever namespace because the location is configured in a config file, as seen below.

Once all of these files are created, update your new button with the values of these two files.
Once deployed, clicking this button will create the new version with the layout from the default language. That is the first problem solved.
Add the data source language version.
Now that we have solved our first problem, it will quickly become apparent that, although we can create a new language version with the same layout, we have no way of override the language version of the renderings that are falling back. This issue can be solved with another custom button.
As well as the ribbon button, this will also exist in the core database.
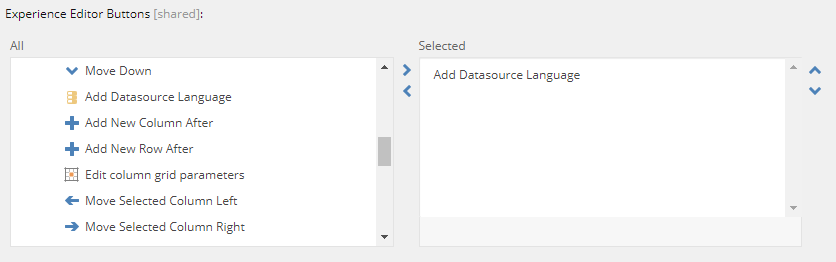
Custom experience editor buttons can be found here.
/sitecore/content/Applications/WebEdit/Custom Experience Buttons
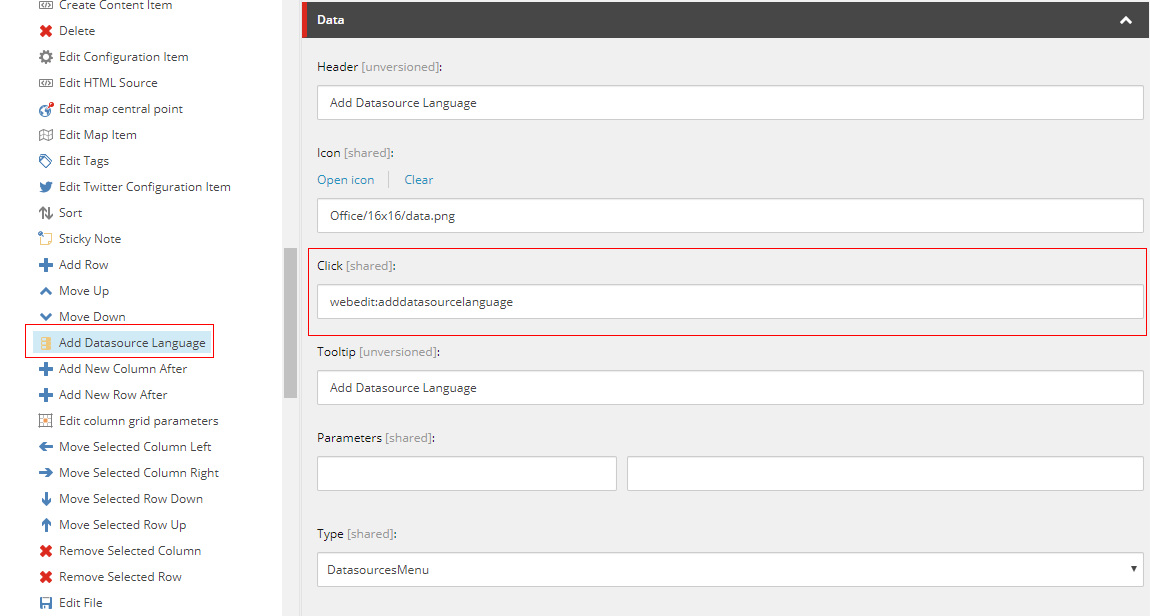
Similarly to the experience editor ribbon button, we can piggyback off of the existing functionality by copying the /Sitecore/content/Applications/WebEdit/Default Rendering Buttons/Set datasource Item, renaming it “Add Data Source Language” and moving it to the custom experience editor buttons folder. For this item, we can also update the name and tooltip, but we won’t need Sitecore Rocks to update the command as it is available in Sitecore.
For the ribbon button, we will need to create this command. The code is below.
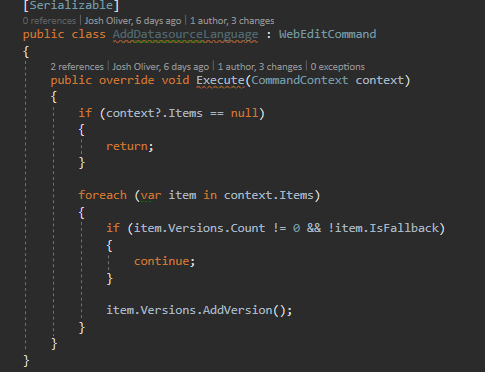
As you can see, this simple code will add a version if the item does not have a version for that language.
The command is also configured in a patch config file.

Once this code is configured, you must add the button to each applicable rendering.
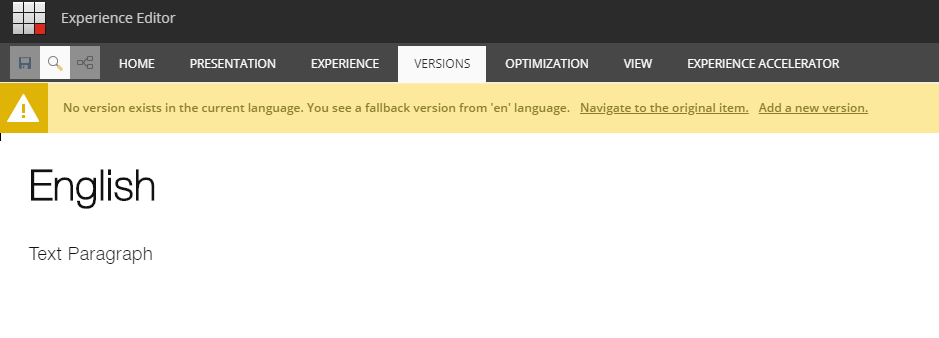
Once all of this is set up, we can go to our page and see it in action.
First, we create our page in our default language. When we navigate to another language, we will see the fallback message.
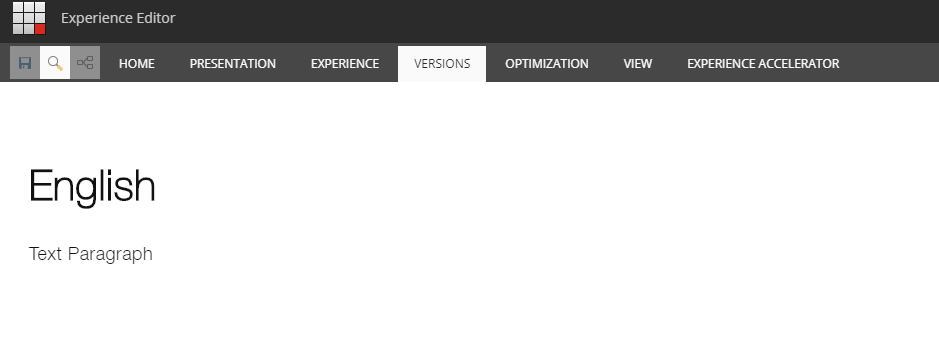
So let’s use our new “Add With Layout” button.
Now you see our second problem. The page is in a new language, but the renderings are still falling back. This is where the second button comes in. Click the rendering and then our new “Add Datasource Language” Button.
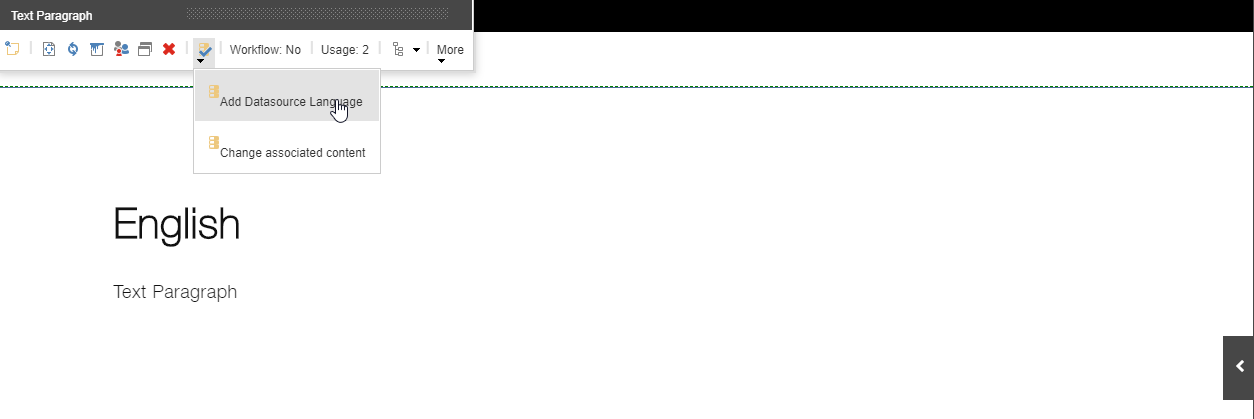
Once we click this, we will now have a version in our current language, and it won’t be falling back.
Using these two custom buttons, we can now create and manage a complex multilingual fallback solution without ever having to use the content editor.