

The Problem
Last year I worked on an engagement that was a Sitecore 8.2 Update 2 solution using Sitecore Helix. I borrowed some elements from the Helix example solution, Habitat. Some of the elements used that impacted CI configuration include the use of gulp.js and gulpfile scripts, the solution folder structure, and serialization via Unicorn.
When it came time to setup automated builds with TeamCity, at the time, I didn t find much in the way of how others were configuring TC with Helix based solutions. I hope this post, and the subsequent post on automated deployment (Part 2), can be a road map for you or provide a starting point for your CI setup journey.
The Solution
This post will focus on the project build steps I configured for a Helix based project. Configuration of other aspects of TC can be found in the Administrator's Guide on TeamCity's site.
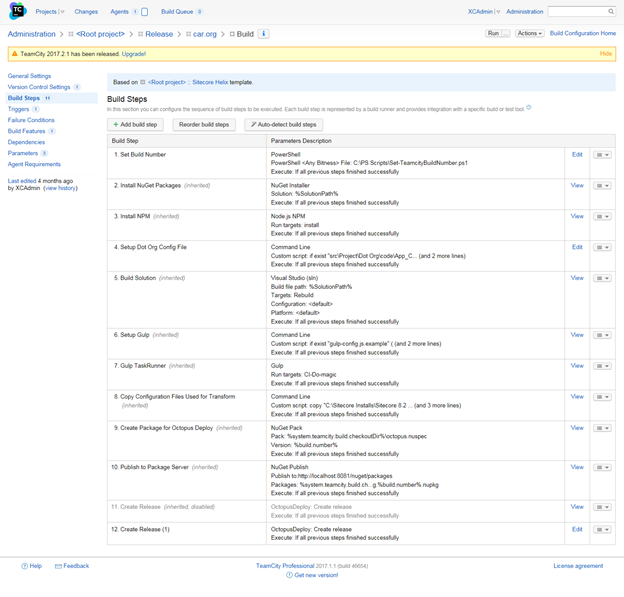
The build steps configured for this solution has 11 steps for a Release build. While you'll see 12 steps total, the 11ths step is disabled, and the 12th step executes in its place.
The following steps can be organized into 3 categories (Build Setup, Build, Deployment Setup). Steps 1 thru 4 and 6 falls into the Build Setup category. These steps exist solely to set up for the build steps. Steps 5 and 7 make up the Build category. These are the steps that are responsible for building the solution. Steps 8 thru 12 are the Deployment Setup steps. Each of these steps works towards resulting in a useable package for Octopus to consume.
A word about how the gulpfiles are used. The intent is for gulpfile.js to be used during local development and gulpfile-ci.js to be used for CI, as the name implies. The thing to keep in mind is that gulpfile-ci.js refers to gulpfile.js which in turn refers to gulp-config.js.
Specific to this solution, we did not check in the gulp-config.js, publishsettings.targets, and zzz.*.DevSettings.config files to allow for unique local configuration on each developer s machine. Instead we checked in a .example version of those files into source control. This prevented the files from being modified each time a developer with different local configurations checked out or committed those files. As a result, TC had to be configured to account for the .example versions of those files. Additionally, TC used the values in the .example versions of those files.
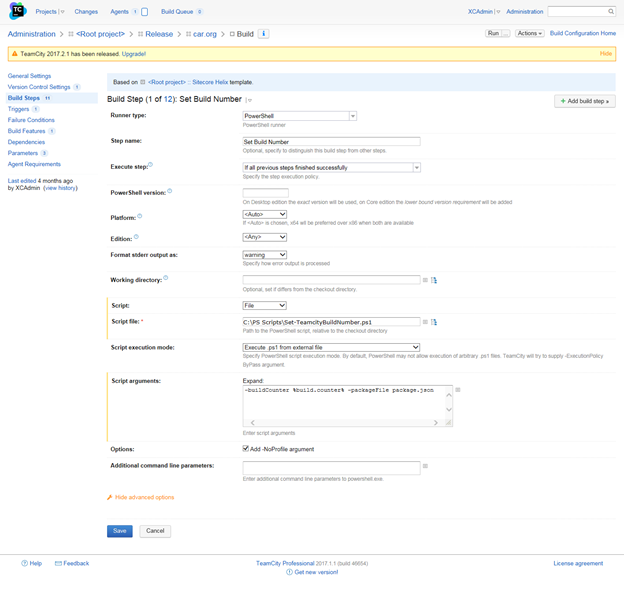
Step 1 Set Build Number
This solution uses a 4-digit version number schema. This step executes a PS script that set s the build number according to a JSON file in the solution that contains the Major, Minor, and Patch values. The PS script is very rudimentary. It simply forms the 4-digit version number by appending the build number to the end of the Major, Minor, and Patch values. The purpose of this build step is to use the 4-digit version number as the number used to identify the build in TC.
Note: This step is not necessary for configuration of TC for a Helix based solution.
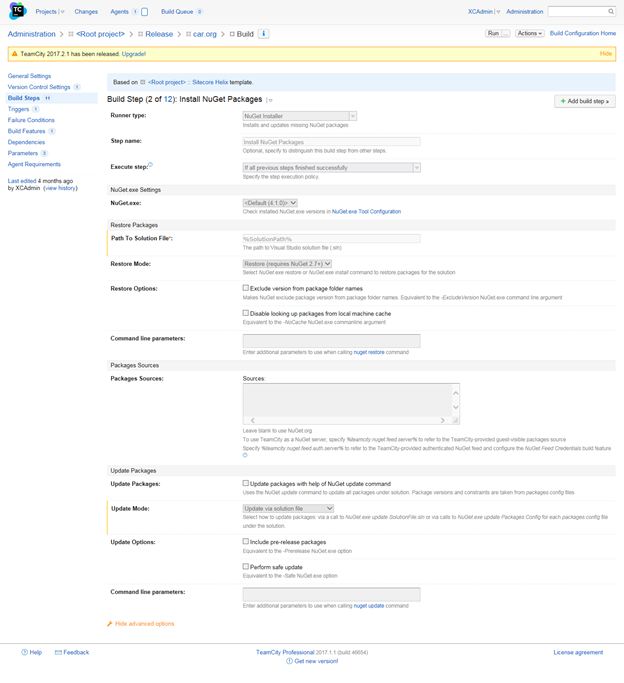
Step 2 Install NuGet Packages
This solution leverages NuGet packages. Therefore, the packages referenced by the solution need to be downloaded. This step is responsible for explicitly downloading the NuGet packages used by the solution instead of relying on the Build Solution step to implicitly download the referenced packages.
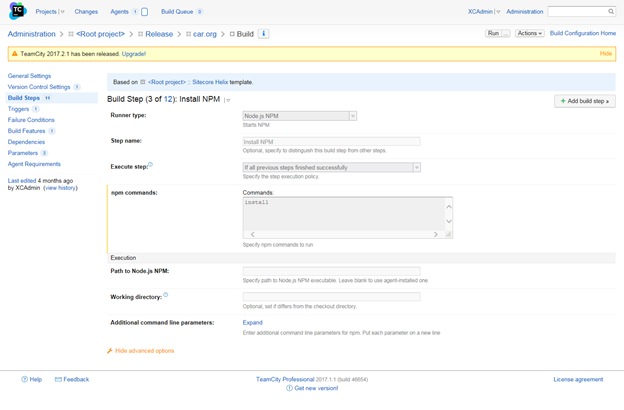
Step 3 Install NPM
Node is leveraged in this solution as it is in the Helix example solution. As such, NPM packages used by the solution need to be installed. This step is responsible for installing all packages used by the solution.
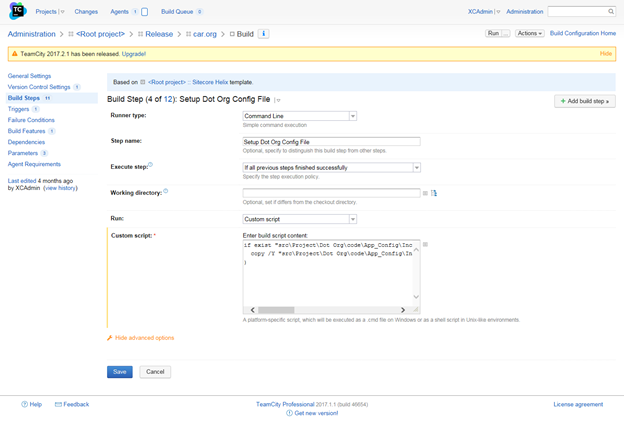
Step 4 Setup Dot Org Config File
More generically, this step should have been named Setup Serialization Base Location Config. This step is responsible for making sure the config file containing the variable which defines the base path of Unicorn serialization folders is available for use during the build steps.
This is one of those *.example files mentioned above. Since zzz.Car.org.DevSettings.config is referenced by the solution, the file pulled down from source control, zzz.Car.Org.DevSettings.config.example,needs to exists to prevent a build error.
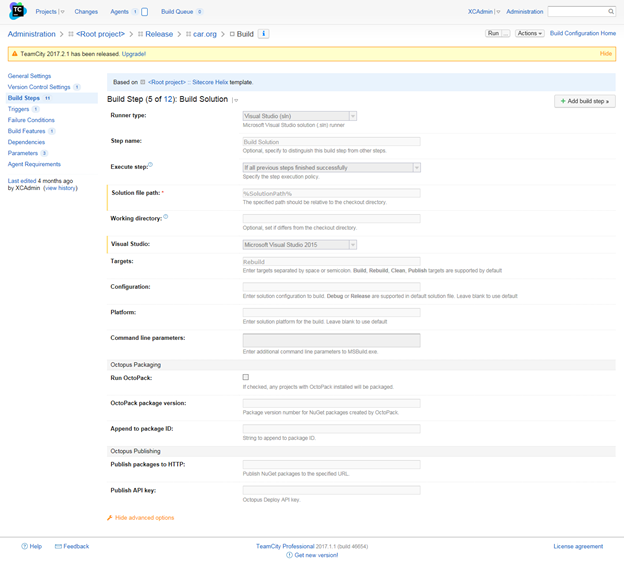
Step 5 Build Solution
This step will kick off a build of the entire solution. While this is not entirely necessary with the execution of the gulp step, it is required if you want to execute a test build step.
Note: This step is not necessary for configuration of TC for a Helix based solution. Additionally, we did not have any test build steps configured in this example.
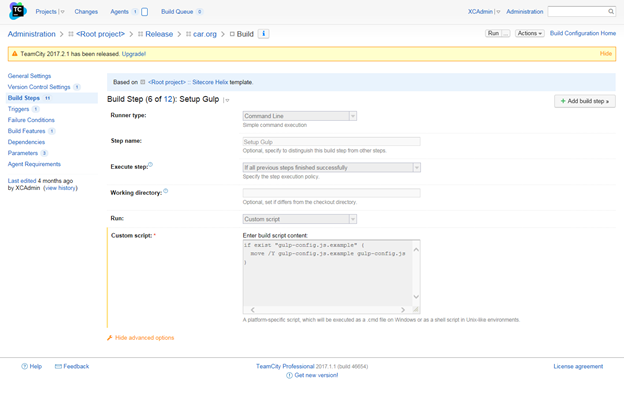
Step 6 Setup Gulp
The gulpfile script requires a helper file, in the form of gulp-config.js. This step ensures that file exists before execution the gulpfile script.
This is another of the *.example files in the solution. As mentioned above gulp-config.js is referenced by gulpfile.js. So, the version pulled from source control, gulp-config.js.example, needs to be renamed to gulp-config.js for the gupfile script not to error.
Step 7 Gulp TaskRunner
This step is responsible for executing the CI-Do-magic function in the gulpfile-ci.js script.

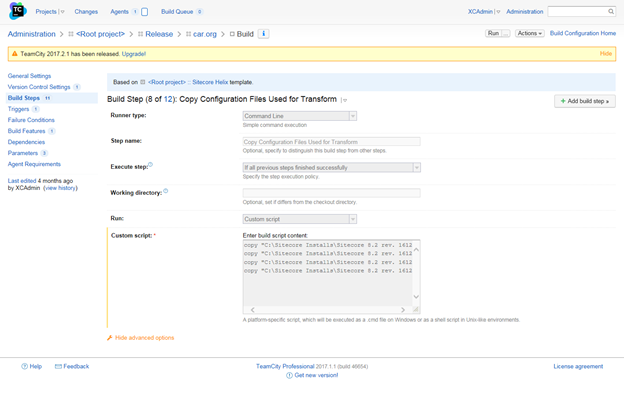
Step 8 Copy Configuration Files Used for Transform
This step ensures the based config files are included in the resulting Octopus Deploy packages that gets created so that Octopus has the necessary files to apply transformations against.
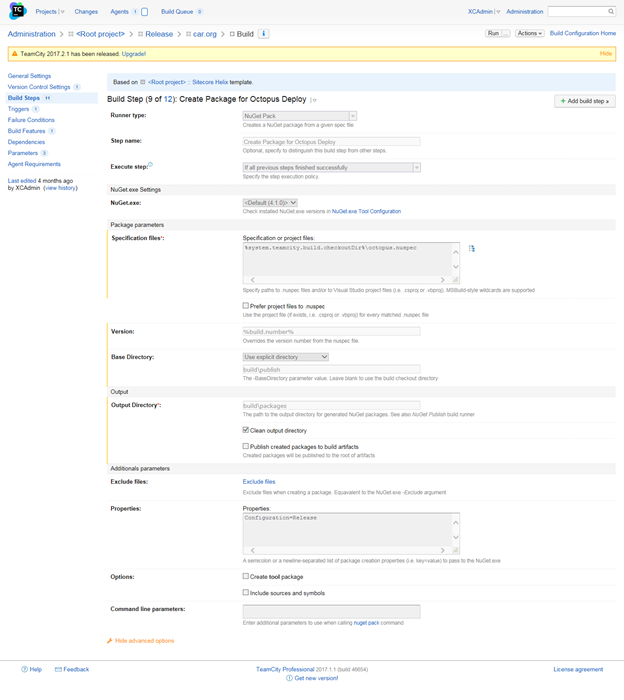
Step 9 Create Package for Octopus Deploy
This is the step responsible for created the Octopus Deploy package.
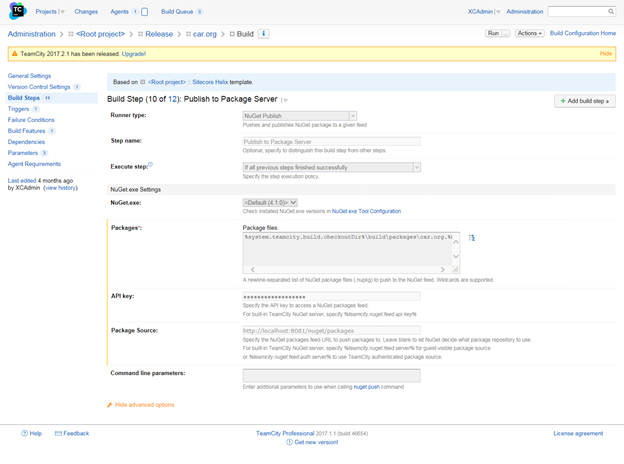
Step 10 Publish to Package Server
This step makes sure the package created in the previous step is published to a package server that is accessible for consumption by Octopus Deploy.
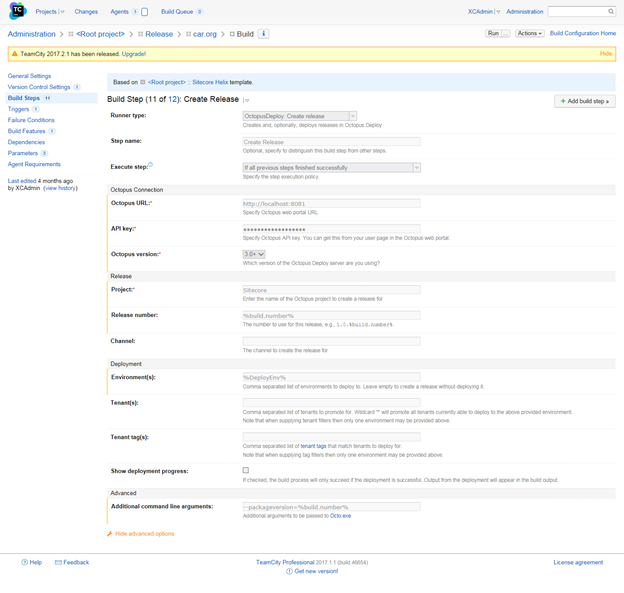
Step 11 Create Release
This step is part of the root project template and is not applicable to the Release project. Step 12 is executed in place of this step.
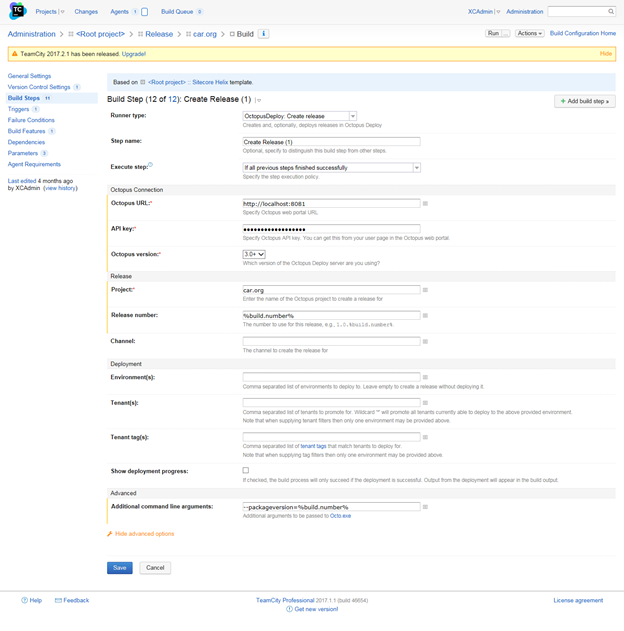
Step 12 Create Release (1)
This step is configured just like the Step 11 with the exception that the resulting package is not automatically deployed into an environment.
Well, I hope this gave you some insight on how to setup a Helix based solution for automated build with TeamCity or at the very least, it gives you a idea for a place to start with your own setup.