Debabrata Biswas
Senior Sitecore Developer
Introduction to MongoDB
June 23rd, 2015
After a fresh installation of sitecore (7.5 onwards) and once you visit some pages on the site you will notice in the sitecore logs exceptions like “Sitecore.Analytics.DataAccess.DatabaseNotAvailableException". This is because Sitecore now uses MongoDB as repository for DMS analytics content, taking advantage of its JSON objects storage structure. You will need to install and configure MongoDB to get rid of this error and can review analytics raw data. I say raw data because the more user friendly display can be found through Sitecore experience dashboard. What I have tried here is to have a Mongo DB quick start guide, its shell view and ultimately a more user friendly view of its data. My belief is that developers should understand the underlying architecture of raw data storage in Mongo DB to grasp it better. You will then compare in the back of your mind on how we used to store information using multiple tables in SQL and how it is representation in a Json document now.
So let us start with a step-by-step instruction, on installation and configuration etc.
1- Go to https://www.mongodb.org/ to download and install the latest of MongoDB.
2- Install with default selections.
3- Although you can start a MongoDB instance as a command prompt shell application best way to proceed is to install this as a manageable windows service application.
4- Create an empty text file and enter the information for Mongo database folder and logs. You can enter them as:
logpath=C:\Data\Mongo\log\mongod.log
dbpath=C:\Data\Mongo\db
Note that you can enter your own desired path and file name here.
5- Save this text file as "[any file name].cfg". This will be the configuration file used by Mongo DB instance.
6- Run from command prompt shell
sc.exe create MongoDB binPath= "\"C:\Program Files\MongoDB\Server\3.0\bin\mongod.exe\" --service --config=\"[your config file path]\[your config file name].cfg\"" DisplayName= "MongoDB" start= "auto"
7- After installing as windows service the entire application path with parameters would now look like "C:\Program Files\MongoDB\Server\3.0\bin\mongod.exe" --service --config="[your config file path]\[your config file name].cfg" (as created in step 5 above.)
8- You can configure your environment variable "Path" to include the installed location "C:\Program Files\MongoDB\Server\3.0\bin".
9- So now you can start Mongo client instance using a command prompt and typing "Mongo". This would then connect automatically to the Mongo server instance of yours, as installed in step 2 above. You can type “help” to see the commands available.
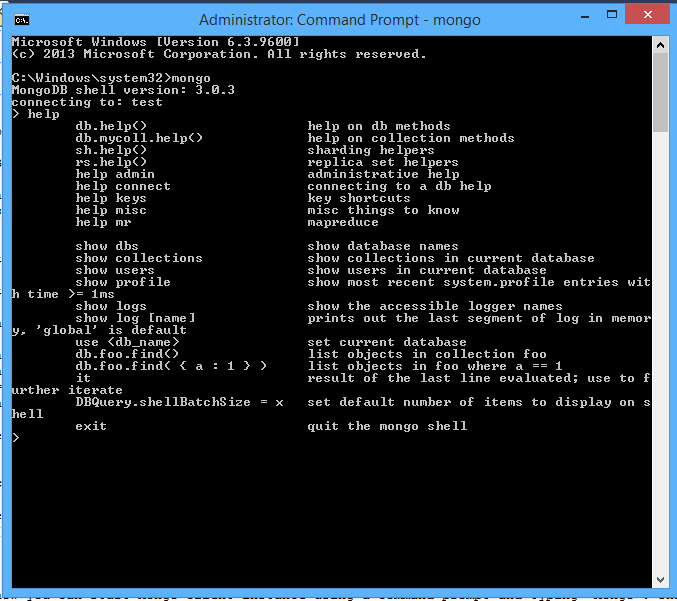
10- Note that you can basically perform javascript programming from within "Mongo" client instance shell like defining and using javascript variables etc. You can type in "help" to see an overview of commands available.
11- Let us now see the Sitecore DMS (xDB) databases that are created by sitecore 8 installation. As seen in a default sitecore 8 installation the connectionstrings config file looks like this:
<add name="analytics" connectionString="mongodb://localhost/analytics" />
<add name="tracking.live" connectionString="mongodb://localhost/tracking_live" />
<add name="tracking.history" connectionString="mongodb://localhost/tracking_history" />
<add name="tracking.contact" connectionString="mongodb://localhost/tracking_contact" />
So there are these four databases that are mentioned here that should be created in MongoDB and indeed if you type in "show dbs" it show these databases along with any other custom databases you might have created. Custom databases can be created by simply typing "use [your custom DB name]", which not only creates it but also changes the context to it.
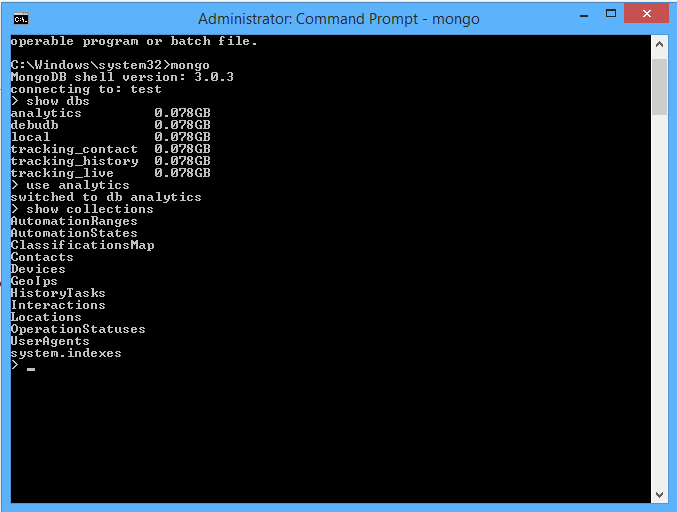
12- So let us say review the "analytics" db. You can type in "use analytics". Please note that all database and collection names are case sensitive.
13- You can then type "show collections" (see figure above) to see the collections within this database. You can think of collections as tables in sql dbs.
14- Let us say go to "Interactions" collection (used to store all visitor information) and if you browse through some of your sitecore site page you should see some data here. So type in "db.Interactions.findOne()" and you show see the first record. The output you will see is all in json format.
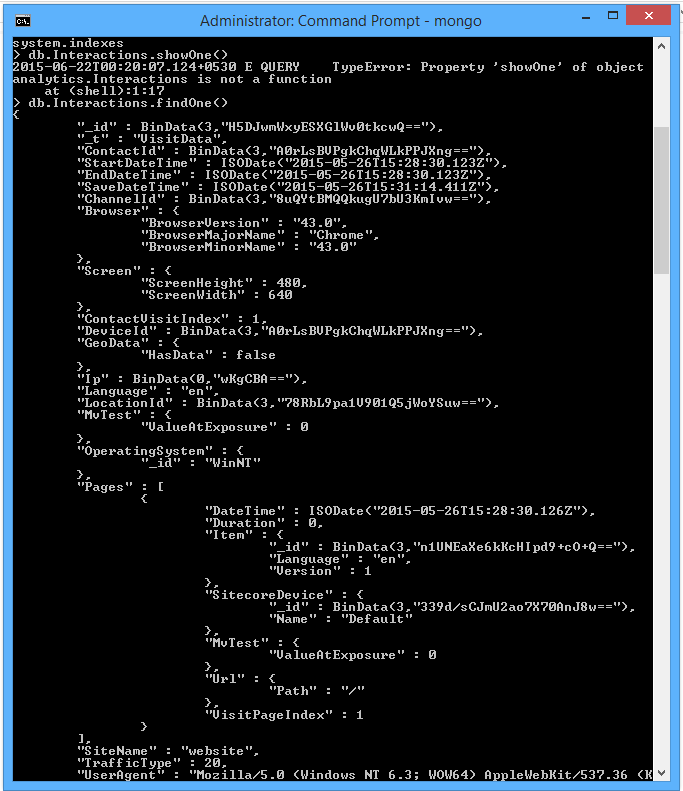
15- One point to note is that Sitecore writes to MongoDB only once the session ends.
16- MongoDB interprets GUIDs as BinData. A better representation of these GUIDs can be achieved when using the C# classes as explained later.
17- Mongo databases and collections combined store data that can include interactions, contacts, devices, location, automation data, and events triggered such as goals converted or campaigns activated.
18- MongoDB database collects all captured experience information in a loosely structured way.
19- SQL Server reporting database stores information extracted from these Mongo collection database in a form suitable for reporting.
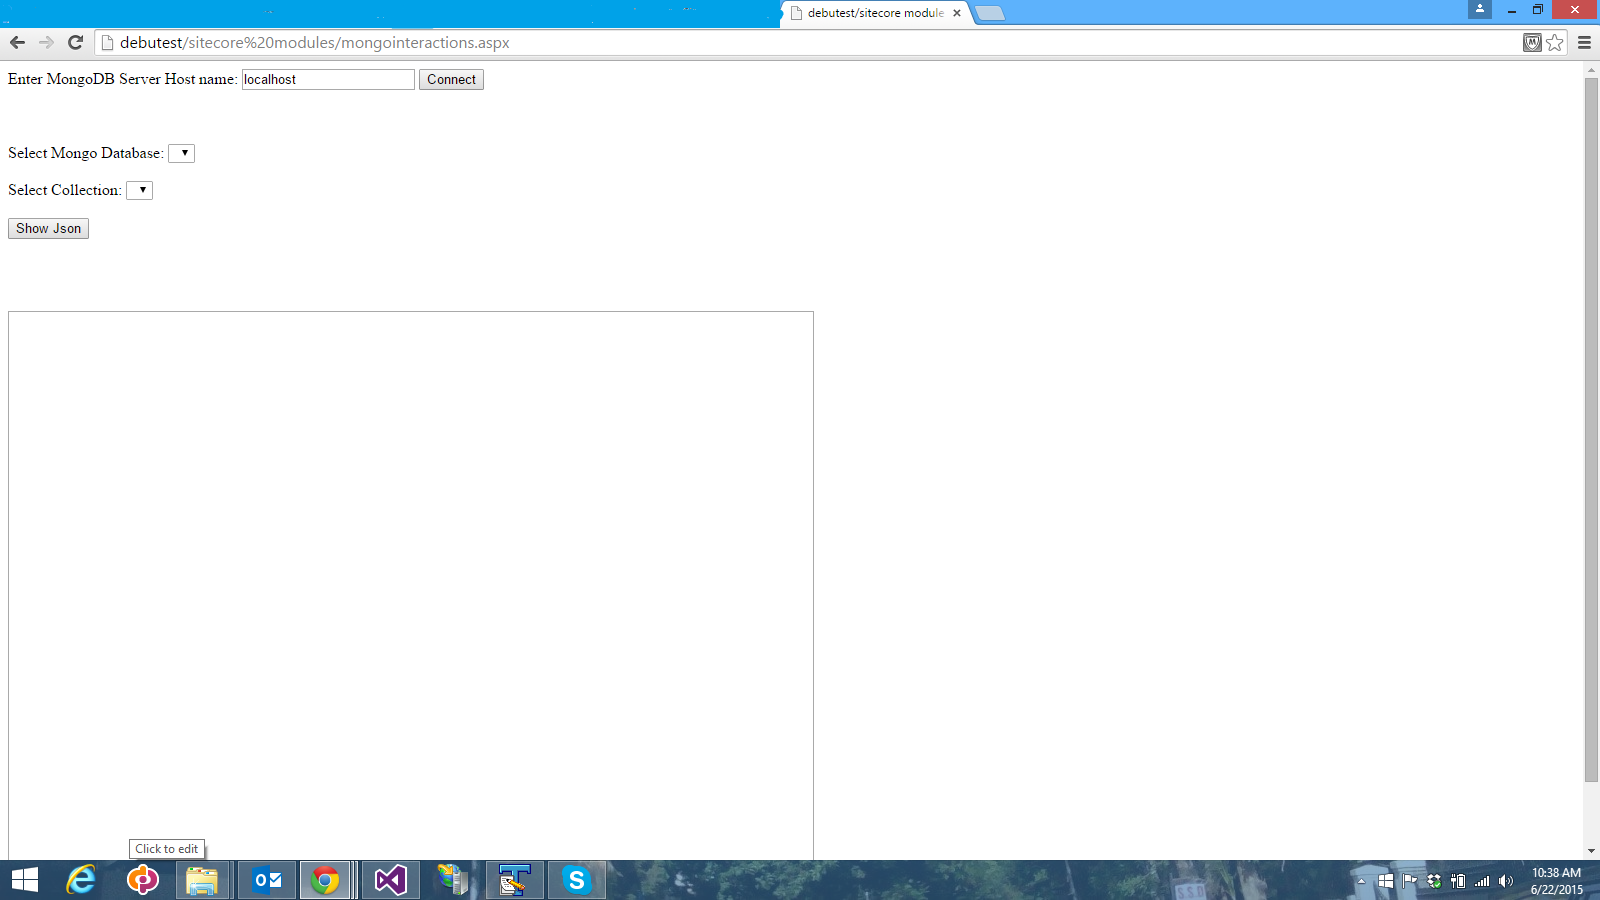
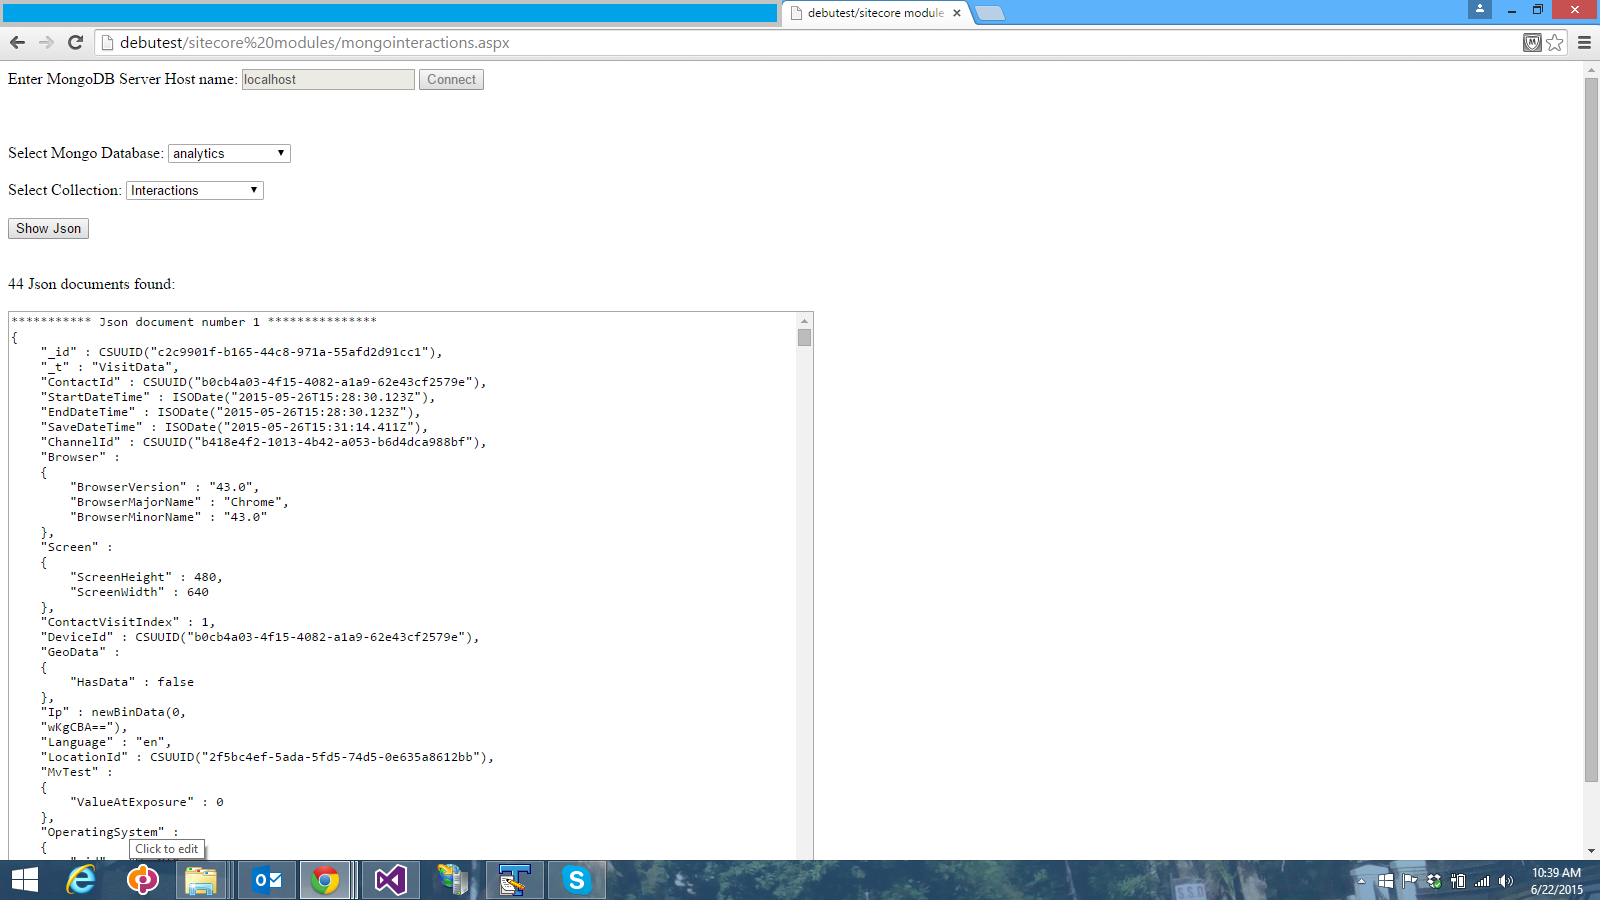
Now that we have seen how it all happens in Mongo shell let us see a much needed user friendly way of interacting with Mongo DB. There are these other UI tools that are available on the web to manage MongoDB like https://mms.mongodb.com and http://www.mongovue.com that you can review. I have gone ahead and implemented my own as below. Fortunately Sitecore 8 comes with c# classes that we can use to fetch records from Mongo DB. The chief dlls you can find are "MongoDB.Bson.Dll" and "MongoDB.Driver.Dll". For my example code below, you can refer to these Dlls in your Sitecore application. Please find the following MongoInteractions code example using web form to parse through Mongo Json documents. You can add the form code into say “Sitecore Modules”, refer the two Dlls above and try it out. You can enter local or remote host name of the Mongo DB server, click “connect”, select the Mongo database, its relevant Collection and voila you can see a good representation of the Json documents. Note that CSUUID represents the item ID in Sitecore.