

One of the best features of InsiteCommerce is its administration console which acts as the main control center for an InsiteCommerce storefront. Within the administration console one can access and modify the product catalog, customer and user information, site search management, and various other configurations.
In addition to the many powerful options that come out of the box in Insite s Admin Console, developers have the ability to extend the console to add features necessary for the client s needs. This article outlines how to extend the Insite Commerce 4.2.0.28152 Administration Console using example code and details relating to a Transactional Email Preferences control area.
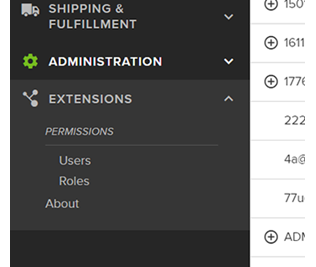
The idea behind this admin console extension is to provide administrators the ability to control which types of emails users will receive based on a user level and an assigned bill-to customer level. The emails being controlled are sent via an email service created to integrate Salesforce Marketing Cloud with Insite, which will be the topic of an upcoming blog from me. Through the console, administrators can navigate to the page shown below to modify email preferences using the same interface and controls as the rest of the administration console.
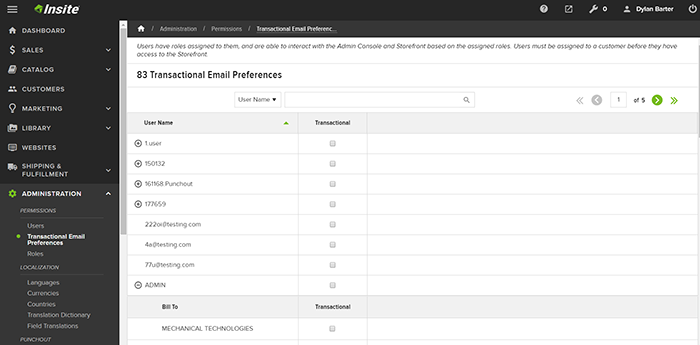
As you can see from the screenshot, this new extension is added under the Administration control area within the subcategory of Permissions. To add a new section in the console, execute the following steps:
Create a copy of MainMenu.json from the source code into your solution.
Note - The admin console and it's out of the box components are almost entirely driven by json. In this example, we are using the same technique to generate a location for our admin console extension, but we are going to use MVC to create and display it.
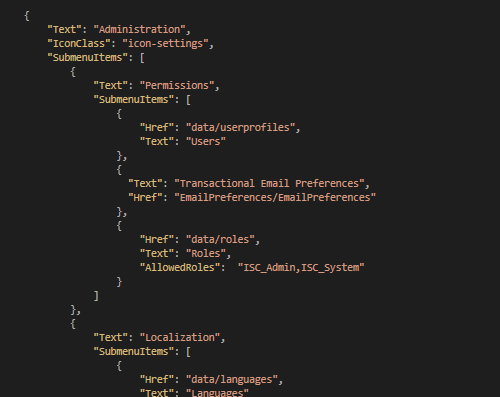
Locate where you want your section to display in the admin console navigation, and add Text and Href attributes to the Submenu Items for that section:
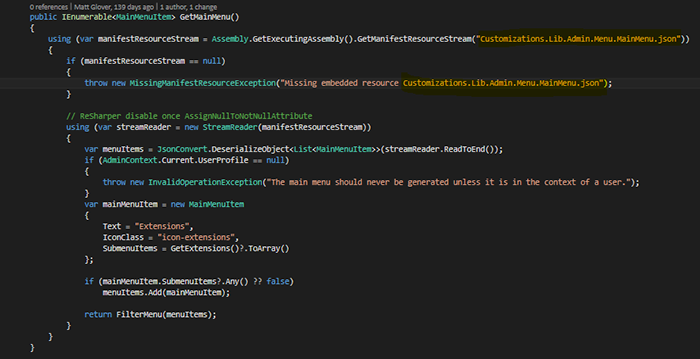
2. Create a copy of the MainMenuProvider class from source and update the MainMenu.json locations inside the GetMainMenu() method to where you saved your file from step 1. It is easier to copy this class rather than override due to the large amount of private methods involved:
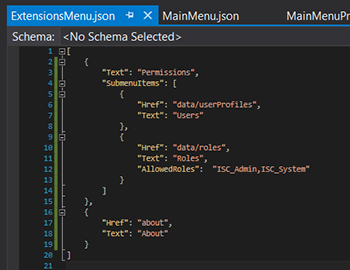
Note: Insite has the functionality to easily create extensions without these past two steps, you would simply add a new entry to the ExtensionsMenu.json file located in InsiteCommerce.Web > Areas > Admin. However, this creates the new extension under an entirely new tab in the console called Extensions which in our example s case was not what the client was looking for:
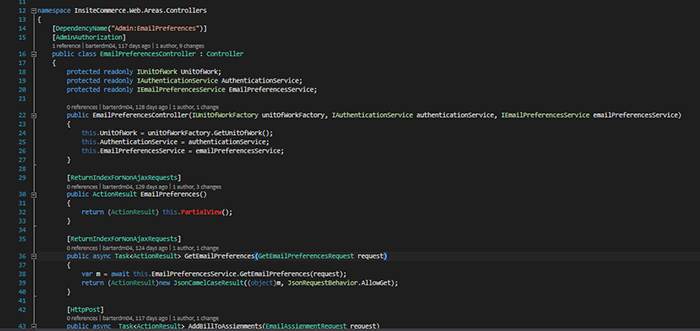
At this point you should be able to see your new extension label in the admin console navigation. The next step is to create a Controller to handle the URL you specified in your MainMenu.json file under the Href tag, create a View to be displayed in the admin console, and create any typescript or stylesheets to help manage the view. You can use this controller to populate your view with an ActionResult as well as handle all your API requests:
- Create a controller and decorate with the AdminAuthorization attribute:The method you create to return your partial view must match the URL you created in the Href section of either MainMenu.json or ExtensionsMenu.json.
2. Create your PartialView to be displayed
a. Since the markup used on the out of the box admin console pages is driven entirely by JSON, we manually recreated the markup in this file and used typescript to populate.
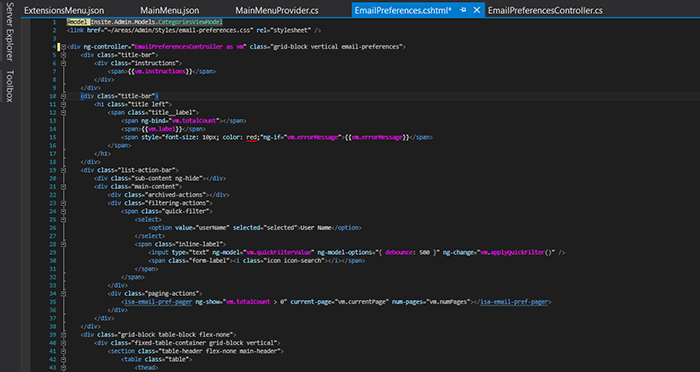
b. The standard features such as search, pagination, and breadcrumbs can be added with typescript directives as shown in the image above.
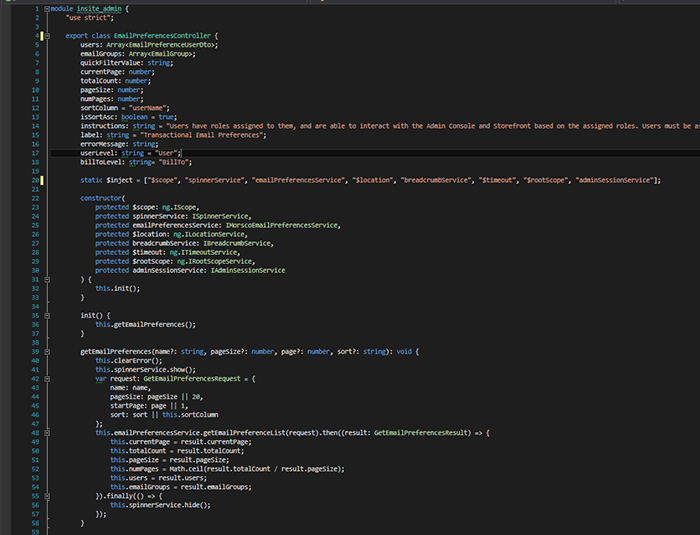
3. Create your typescript controller, typescript services, and external stylesheets needed to perform the extension s functionalities:
a. Methods for sorting, toggling, and searching are included in this controller.
From here you should be able to visibly navigate to your newly created view for your extension in the admin console. This example is just one of the many ways you can extend the administration console in InsiteCommerce. Extending the console provides the client options for enhancing control and functionality to better serve their needs.
Keep an eye out for my next blog which describes how we can integrate Salesforce Marketing Cloud with Insite Commerce.